
How to Clean Pet Hair from Brush: Step-by-Step Guide
Table of Contents
- What You'll Need to Clean Pet Hair from a Brush
- Step-by-Step: How to Remove Pet Hair from a Brush
- Deep Cleaning: Soaking and Washing Your Brush
- How to Sanitize Pet Grooming Tools
- How Often to Clean Dog Brush
- Choosing the Best Grooming Brush for Shedding Dogs
- Common Mistakes to Avoid When Cleaning Pet Brushes
- Frequently Asked Questions
Last Updated: September 15, 2026
What You'll Need to Clean Pet Hair from a Brush
Knowing how to clean pet hair from a brush is the unglamorous chore that keeps your grooming tools working and your home free of loose fur. Most owners wait until the bristles are completely matted, which is exactly when cleaning becomes hardest. A simple maintenance routine extends the life of every grooming tool you own.

Gather these supplies before you start:
- A rat tail comb or a sturdy pick
- Warm water and a basin or sink
- Gentle soap or dish liquid
- White vinegar or apple cider vinegar
- An old toothbrush for scrubbing
- A towel for drying
The tools you choose matter less than consistency. A five-minute clean every week prevents the hardened clumps that turn a quick job into a thirty-minute ordeal.
Step-by-Step: How to Remove Pet Hair from a Brush
Removing pet hair from a brush follows a simple sequence: loosen the hair, extract it, then wash away the residue. Skipping the dry removal step is the most common mistake, because wet hair clumps and binds tighter to the bristles.
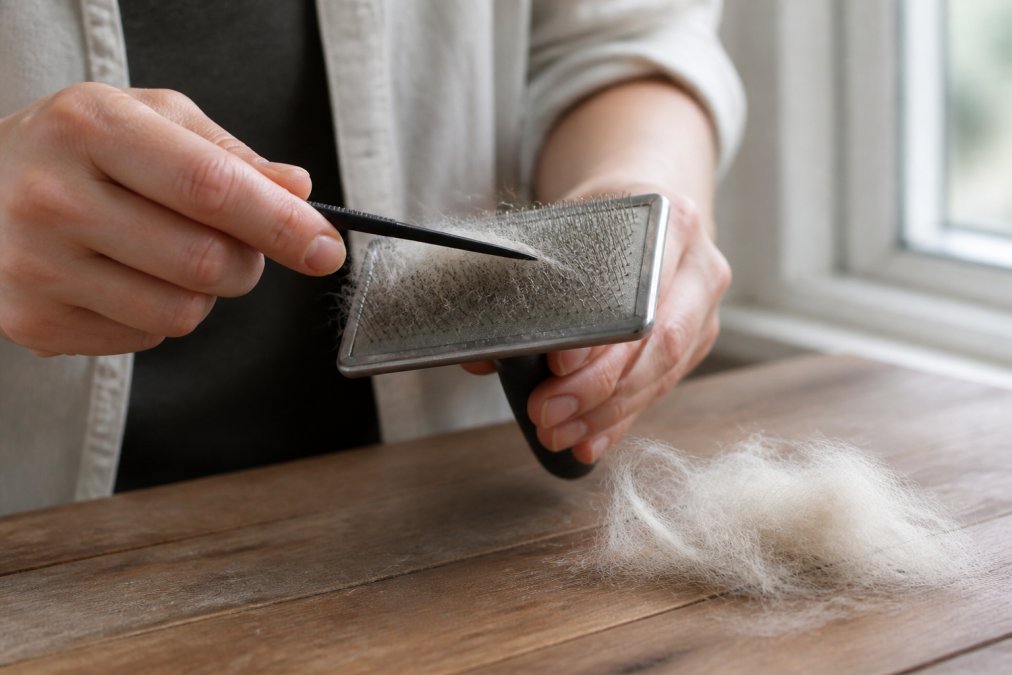
Removing Loose Hair Manually
Start by pulling away the top layer of fur with your fingers. Work from the outer edges toward the center of the brush head. For slicker brushes, lift the hair mat straight up rather than dragging it sideways, which pushes debris deeper into the pins.
If the hair comes away in one sheet, you've caught it at the right time. If it crumbles and scatters, the brush has gone too long between cleanings.
Using a Rat Tail Comb or Pick
A rat tail comb is the best tool for working hair out from between tight bristles. Insert the tail end at the base of the bristles and lift upward in short strokes. Move across the brush head in rows, clearing each section before moving on.
For pin brushes, a metal pick works faster. Slide it under the matted hair and lever it out. This loosens clumps that fingers can't reach and protects the bristle base from bending.
Deep Cleaning: Soaking and Washing Your Brush
Deep cleaning removes the invisible layer that dry removal leaves behind: oils, dander, and residue that harbor bacterial growth. Soak your brush every two to four weeks, or weekly during heavy shedding season (At-Home Pet Grooming: Top Tips and Recommendations).
Vinegar and Water Solutions
Mix one part white vinegar with two parts warm water in a basin. Submerge the brush head only, keeping the handle above the waterline to protect handle integrity. Let it soak for 10 to 15 minutes.
Apple cider vinegar works equally well and leaves less odor. Add a drop of gentle soap to cut through oily residue. The acid in vinegar breaks down dander and discourages mold prevention issues in humid bathrooms.
Rinsing and Drying Techniques
Rinse the brush under warm running water until it runs clear. Shake off excess moisture, then press the bristles into a toweled surface to wick away remaining water.
Never store a damp brush in a closed drawer. Set it bristle-side down on a towel and let it air dry completely. A force dryer on a cool setting speeds this up for thick slicker brushes, but keep the nozzle at a distance so you don't bend the pins.
How to Sanitize Pet Grooming Tools
Sanitizing is not the same as cleaning. Cleaning removes visible hair, dander, and oils. Sanitizing kills the bacteria, yeast, and parasites that survive a routine wash, including ringworm spores and flea eggs, which can linger on bristles for weeks. Most guides treat these as one step. They are not, and skipping the distinction is how skin conditions get passed between pets.
Cleaning vs. Disinfecting: What Actually Matters
Cleaning physically removes organic matter. Disinfecting uses a chemical agent to kill pathogens. If you disinfect a brush that still has hair and dander on it, the organic load blocks the disinfectant from reaching the bristle surface. The CDC's guidance on disinfecting household surfaces makes this clear: clean first, disinfect second (the CDC). The same principle applies to grooming tools.
For pet brushes, the bristle base is the critical zone. Dander, skin cells, and sebum collect where the pins meet the pad. This warm, moist microclimate is where bacteria and yeast thrive. A quick rinse won't reach it. You need mechanical agitation, an old toothbrush works well, followed by a disinfectant with the correct contact time.
Choosing a Disinfectant That's Safe for Pets
Not all disinfectants are safe for tools that touch animal skin. Here's how the common options compare:
- Accelerated hydrogen peroxide (e.g., Rescue brand): Kills bacteria, viruses, and fungi, including ringworm. Generally considered safe for pet surfaces when used as directed and allowed to dry. Contact time is typically 1-5 minutes.
- Quaternary ammonium compounds (e.g., many household disinfecting wipes): Effective but can leave residue that irritates skin. Rinse thoroughly if you use them.
- Bleach solutions (1:32 dilution): Effective against most pathogens but corrosive to metal pins over time and harsh on skin if not fully rinsed. Use only on plastic or metal brushes with no wooden parts.
- Vinegar: A good cleaner and mild disinfectant, but it does not kill ringworm spores or parvovirus. Do not rely on it as your only sanitizer.
After disinfecting, rinse the brush head thoroughly under running water. Residue left on bristles can cause contact dermatitis on your pet's skin. Air dry completely before the next use, moisture invites bacterial regrowth.
When to Sanitize vs. When to Just Clean
A common pattern among groomers: sanitize monthly for healthy pets, and after every use for pets with a diagnosed skin condition, ringworm, or a recent flea infestation. If you groom multiple pets, sanitize between animals to avoid cross-contamination. Shelters and rescues typically sanitize daily.
If your pet has sensitive skin or a compromised immune system, err toward more frequent sanitizing. A dirty brush reintroduces the irritants you're trying to remove.
How Often to Clean Dog Brush
How often to clean dog brush depends on coat type and shedding volume. A quick dry clean after every grooming session takes under a minute. A full wash every two to four weeks keeps most brushes hygienic.
Double-coated breeds like Huskies and German Shepherds need more frequent attention during seasonal blowouts. Short-coated dogs can go longer between deep cleans. Cats with dense undercoats fall somewhere in between, and their self-grooming habits mean more dander collects on the brush.
| Coat Type | Dry Clean | Deep Wash | Sanitize |
|---|---|---|---|
| Short, single coat | After each use | Every 3-4 weeks | Monthly |
| Double coat | After each use | Every 1-2 weeks | Every 2 weeks |
| Long or curly | After each use | Weekly | Every 2 weeks |
| Senior or skin issues | After each use | Weekly | Weekly |
If your pet has sensitive skin, err toward more frequent cleaning. A dirty brush reintroduces the irritants you're trying to remove.
Choosing the Best Grooming Brush for Shedding Dogs
The best grooming brush for shedding dogs is one that matches your pet's coat and is easy to clean afterward.
Common Mistakes to Avoid When Cleaning Pet Brushes
Material-Specific Care: Bamboo, Plastic, and Metal
Self-Cleaning Brushes: The Hidden Maintenance Nobody Talks About
Here's how to maintain one:
Other Mistakes That Shorten Brush Life
Frequently Asked Questions
Why is there grey fuzz in my pet grooming brush?
Grey fuzz in a pet grooming brush is usually a mix of dead skin cells, dander, dust, and fine undercoat hair. It builds up when you brush a shedding dog or cat and don't clean the bristles regularly. This residue can harbor bacteria and mold if left on the brush. Soaking the brush head in a white vinegar and water solution loosens the fuzz so you can rinse it away completely.
How can I remove stubborn buildup from a slicker brush?
Stubborn buildup on a slicker brush often collects at the base of the pins where a simple rinse won't reach. Submerge the brush head in warm water with a few drops of gentle soap and a splash of white vinegar for 10 to 15 minutes. Then use a rat tail comb to rake between the rows of pins, working from the base outward. Rinse thoroughly and air dry pin-side down.
What is the best way to disinfect a pet brush?
After removing all loose hair and debris, rinse the brush thoroughly with clean water and let it air dry completely before the next use. Avoid bleach on natural wood handles because it can damage the finish and leave residue.
How often should I clean my dog's grooming brush?
For dogs that shed heavily or have a double coat, clean the brush after every grooming session by removing trapped hair. Do a deeper wash with soap and water every two to four weeks, depending on how often you brush. If your dog has skin issues or you groom multiple pets with the same brush, sanitize weekly. Regular maintenance keeps bristles effective and prevents bacterial growth.
Pet hair builds up faster than most owners expect, and a clogged brush turns a calming routine into a chore. pettspy makes that maintenance simpler with tools designed for effortless cleanup: a one-button hair release, gentle flexible bristles, and an ergonomic handle built for long grooming sessions. Explore the pettspy grooming range and keep every brush ready for the next session.